Debugging Elasticsearch in Eclipse
I’m one of those developers that think that debugging an application is a great way of gaining knowledge about its inner workings, not just for finding problems but also for educational purposes. Elasticsearch is one of my favorite open source projects that I sometime have the pleasure of debugging. The Elasticsearch homepage is not that extensive when it comes to building and running Elasticsearch in Eclipse so I’m giving a short description of how it is done.
Getting the source code
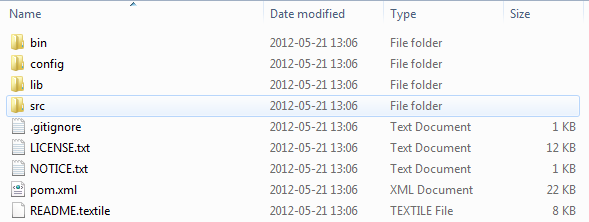
There are a number of ways of getting the ES source code from its github repository. Either you can clone the repository directly or fork it (allowing you to commit changes to your forked version) or you can download the zip archive for each released version from the tags section. Either way you should end up with a folder looking like (0.19.x- version):
Importing into your Eclipse workspace
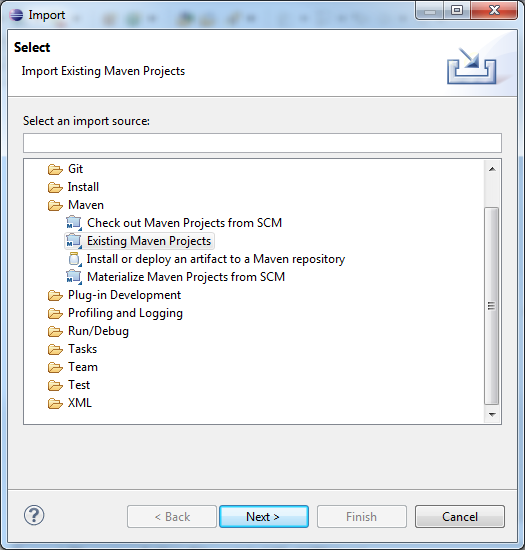
Now it is time to open your Eclipse workspace. To import the ES project select File -> Import and select Existing Maven project as import source:
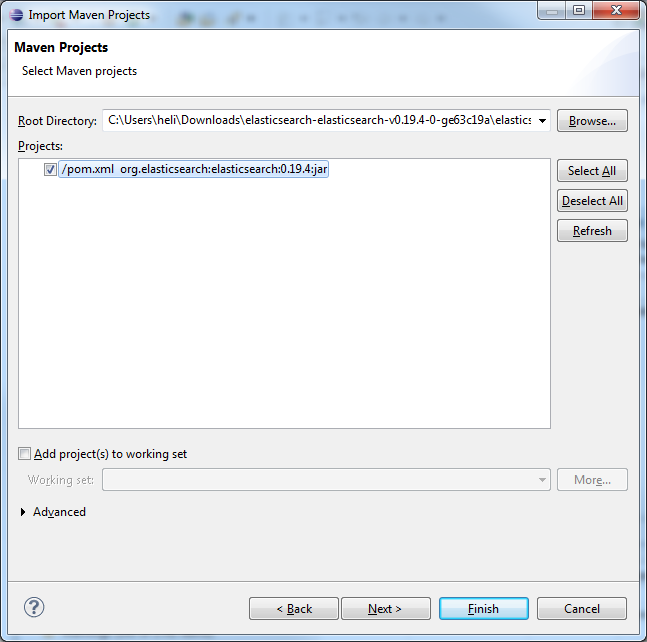
Select the root folder of the ES source code, the pom.xml should appear in the projects list, and press finish:
Note: Eclipse will not copy the directory into the workspace but instead just reference to it. Therefore I usually copy the project into the workspace folder before importing it.
The Error
After importing the project eclipse will load its configuration and BOOOM: maven-dependency-plugin (goals “copy-dependencies”, “unpack”) is not supported by m2e. giving you a red x on your project preventing you from building it. The copy-dependencies task is not supported by the m2e plugin but it isn’t needed to build the project either so by adding:
<pluginManagement>
<plugins>
    <!-- Ignore/Execute plugin execution -->
    <plugin>
        <groupId>org.eclipse.m2e</groupId>
        <artifactId>lifecycle-mapping</artifactId>
        <version>1.0.0</version>
        <configuration>
            <lifecycleMappingMetadata>
                <pluginExecutions>
                    <!-- copy-dependency plugin -->
                    <pluginExecution>
                        <pluginExecutionFilter>
                            <groupId>org.apache.maven.plugins</groupId>
                            <artifactId>maven-dependency-plugin</artifactId>
                            <versionRange>[1.0.0,)</versionRange>
                            <goals>
                                <goal>copy-dependencies</goal>
                            </goals>
                        </pluginExecutionFilter>
                        <action>
                            <ignore />
                        </action>
                    </pluginExecution>
                </pluginExecutions>
            </lifecycleMappingMetadata>
        </configuration>
    </plugin>
</plugins>
</pluginManagement>
into your <build> tag in your pom.xml you can ignore this error. After changing your pom.xml you need to update the maven configuration by right clicking on the projects root folder and Maven -> Update Project Configuration… and click ok in the presented dialog.
Building
So it is time to build the ES source code. Right click on the projects root folder -> Run As -> Maven build… Set ‘package’ as goal and check the skip tests box and click Run:

Hopefully your console will print out what it is doing during the build ending with:
[INFO] ------------------------------------------------------------------------
[INFO] BUILD SUCCESS
[INFO] ------------------------------------------------------------------------
[INFO] Total time: 31.924s
[INFO] Finished at: Tue Jun 19 10:58:40 CEST 2012
[INFO] Final Memory: 25M/745M
[INFO] ------------------------------------------------------------------------
Now you have a built version in the target folder (the default output folder).
Running ES
So to the final step of actually running ES. Locate ElasticSearchF.java in org.elasticsearch.bootstrap, or ElasticSearch.java if you don’t want to run ES in the foreground. Right click it and select Run As -> Java Application. Voila! Now you have ES running in your Eclipse environment and you can you can play with it in your own little sandbox as you please.
[2012-06-19 11:06:03,938][INFO ][node                     ] [Jessica Jones] {0.19.4}[13732]: initializing ...
[2012-06-19 11:06:03,944][INFO ][plugins                  ] [Jessica Jones] loaded [], sites []
[2012-06-19 11:06:05,296][INFO ][node                     ] [Jessica Jones] {0.19.4}[13732]: initialized
[2012-06-19 11:06:05,296][INFO ][node                     ] [Jessica Jones] {0.19.4}[13732]: starting ...
[2012-06-19 11:06:05,372][INFO ][transport                ] [Jessica Jones] bound_address {inet[/0.0.0.0:9301]}, publish_address {inet[/192.168.150.15:9301]}
[2012-06-19 11:06:08,522][INFO ][cluster.service          ] [Jessica Jones] detected_master [Human Robot][V2sqZITgSO26kayUlQs6BQ][inet[/192.168.150.15:9300]], added {[Human Robot][V2sqZITgSO26kayUlQs6BQ][inet[/192.168.150.15:9300]],}, reason: zen-disco-receive(from master [[Human Robot][V2sqZITgSO26kayUlQs6BQ][inet[/192.168.150.15:9300]]])
[2012-06-19 11:06:08,530][INFO ][discovery                ] [Jessica Jones] elasticsearch/1mcX3rqkTL2WdAoEquhLdQ
[2012-06-19 11:06:08,545][INFO ][http                     ] [Jessica Jones] bound_address {inet[/0.0.0.0:9201]}, publish_address {inet[/192.168.150.15:9201]}
[2012-06-19 11:06:08,545][INFO ][node                     ] [Jessica Jones] {0.19.4}[13732]: started